
By Tom Wilkins • Updated March 2025 • 12 min read
I’ve had boaters drive six hours to my shop with a truck full of cash, ready to buy an outboard they saw online. Ten minutes into my inspection, I hand them the compression gauge and say, “Look at cylinder three.”
They see 60 PSI. The other five cylinders are at 120 PSI. They walk away. They saved themselves $8,000 and a season of frustration.
Here’s the truth: A compression test is the single most important test you can do on a used outboard before buying it. It tells you if the engine is healthy, dying, or already dead.
I’m going to show you exactly how we do it in our shop. No shortcuts. No guessing. Just the method I’ve used on over 12,000 engines.
Measuring the Engine’s Ability to Build Pressure
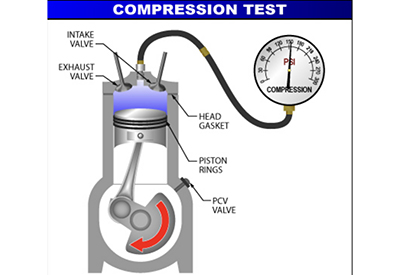
An outboard engine works by compressing air and fuel in a cylinder, then igniting it with a spark plug. The explosion pushes the piston down, which turns the crankshaft, which turns the propeller.
If the cylinder can’t hold pressure — because of worn piston rings, a cracked cylinder head, or a blown head gasket — that cylinder doesn’t fire properly. The engine loses power, burns more fuel, and eventually fails completely.
A compression test measures the maximum pressure each cylinder can generate when the engine is cranked. It’s like taking your blood pressure. One number doesn’t tell you everything. But the pattern across all cylinders tells the whole story.
“Compression is the engine’s ability to squeeze air and fuel before ignition.”
Tools of the Trade — Under $50
You don’t need a full shop to do a compression test. Here’s what I use:
1. Compression Gauge
Cost: $25-$50 at any auto parts store
What to buy: Get one with a threaded adapter, not just a rubber cone. The cone type leaks pressure and gives false low readings. I use a Snap-On or OTC brand, but even a cheap Actron from AutoZone works if you use it correctly.
2. Spark Plug Socket
Cost: $5-$10
What to buy: A deep-well socket with a rubber insert to hold the spark plug. Most outboards use a 5/8-inch or 13/16-inch socket.
3. Ratchet and Extension
Cost: $10-$20
What to buy: A 3/8-inch drive ratchet with a 6-inch extension. Some outboards have recessed spark plugs that need the extension to reach.
4. Spark Plug Gap Tool
Cost: $2
What to buy: A simple coin-style gap tool. You’ll need to check and reset gaps before reinstalling plugs.
5. Notebook and Pen
Cost: $1
What to buy: Write down every reading. Your memory will fail you.
Total investment: Under $50. That’s cheap insurance before spending $5,000-$15,000 on a used outboard.
Image description to add here: A flat lay photo of all the tools laid out — compression gauge, spark plug socket, ratchet, extension, gap tool, notebook. Caption: “Everything you need for a compression test — under $50 at any auto parts store.”
Internal link opportunity: Add at the end of this section: “Download our printable compression test checklist →” (Link to PDF download on your site.)
Step-by-Step — How We Do It in Our Shop
*The 15-Minute Test That Saves Thousands*
I’m going to give you the exact procedure we use on every outboard that comes through Wave Outboard Riders. Follow these steps in order. Don’t skip any.
Step 1: Warm Up the Engine (If Possible)
A cold engine gives lower compression readings than a warm one. If the outboard is installed on a boat, start it and let it run for 5-10 minutes until it reaches operating temperature.
If you’re testing an outboard on a stand (like we do in our shop), you can still get useful readings cold — just know they’ll be about 10-15 PSI lower than warm readings.
Pro tip: If the seller refuses to let you warm up the engine before testing, walk away. There’s a reason they don’t want you to see warm readings.
Step 2: Disable the Ignition and Fuel
You don’t want the engine starting while you’re testing. Here’s how to disable it:
-
For most outboards: Remove the kill switch lanyard or clip
-
For older outboards: Disconnect the main ignition wire from the ignition coil
-
For fuel-injected engines: Pull the fuel pump fuse or disconnect the fuel line
Safety warning: Gasoline is flammable. Work in a well-ventilated area. No smoking. No open flames.
Step 3: Remove All Spark Plugs
Remove every spark plug, not just one. Here’s why: If you leave other plugs in, the engine has to work against compression in those cylinders, which slows down the cranking speed and gives false low readings on the cylinder you’re testing.
Important: Lay the spark plugs out in order. Cylinder 1 plug goes in the “Cylinder 1” spot on your workbench. Keep track of which plug came from which cylinder. The condition of each plug tells its own story — more on that later.
Image description to add here: A photo of spark plugs laid out in order on a workbench, numbered 1 through 6. Caption: “Always lay spark plugs out in cylinder order — the condition of each plug tells you something different.”
Step 4: Install the Compression Gauge
Screw the threaded adapter of your compression gauge into the first spark plug hole. Hand-tighten only. Do not use a wrench — you can damage the threads in the cylinder head.
If you’re using a rubber-cone gauge (not recommended), have a helper press it firmly against the spark plug hole while you crank the engine.
Step 5: Crank the Engine
Open the throttle all the way (this lets more air into the cylinders). Then crank the engine for 5-6 compression strokes — about 3-4 seconds of cranking.
Watch the gauge. The needle will climb with each compression stroke. When it stops climbing, that’s your reading. Write it down immediately.
Repeat for every cylinder. Test cylinder 1, then move to cylinder 2, then cylinder 3, and so on. Write down every reading before moving to the next cylinder.
Step 6: Interpret the Results (The Important Part)
You’ve got your numbers. Now what?
What good compression looks like:
-
All cylinders within 10% of each other
-
For a warm engine: 100-140 PSI (varies by engine)
-
For a cold engine: 85-120 PSI
What bad compression looks like:
-
One cylinder 20+ PSI lower than the others = almost certainly a problem
-
Two adjacent cylinders low = likely a blown head gasket between them
-
All cylinders low = worn rings or a timing issue
Example from our shop last week:
We tested a 2015 Yamaha 150 that looked beautiful. Shiny paint. Low hours claimed. Here were the readings:
-
Cylinder 1: 125 PSI
-
Cylinder 2: 122 PSI
-
Cylinder 3: 68 PSI ← Problem
-
Cylinder 4: 120 PSI
Cylinder 3 was dead. We passed on the engine. Two weeks later, the seller called us back — the engine had seized. We dodged a bullet.
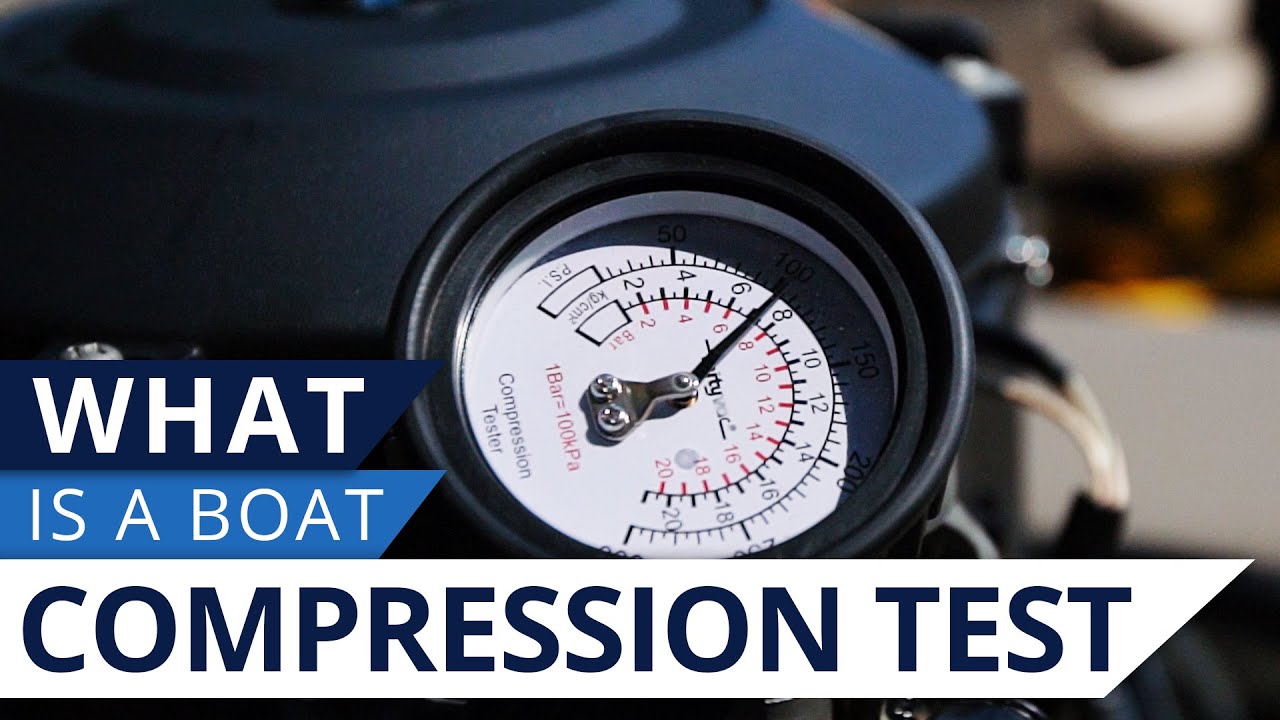
Image description to add here: A close-up photo of a compression gauge showing a low reading (around 60 PSI). Caption: “60 PSI on a cylinder where the others read 120 PSI? Walk away. Don’t negotiate. Walk away.”
While You’ve Got Them Out, Read the Plugs
You already removed the spark plugs. Don’t just throw them back in. Read them. They tell a story the compression gauge can’t.
Normal plug: Light tan or grayish-brown color. Electrode shows moderate wear. This cylinder is healthy.
Black, sooty plug: The engine is running rich (too much fuel) or the spark is weak. Could be a bad fuel injector, faulty ignition coil, or clogged air filter.
White, blistered plug: The engine is running lean (too little fuel) or overheating. This is dangerous. Lean conditions melt pistons. Do not buy an engine with white plugs without a full diagnosis.
Oily, wet plug: Oil is getting into the cylinder. Worn piston rings or valve seals. This engine burns oil. Walk away.
Gap wider than spec: The plug is old. Not a deal-breaker, but factor in a new set of plugs ($20-$50) into your offer.
Image description to add here: A reference chart showing four spark plugs — normal (tan), black (sooty), white (blistered), and oily. Caption: “Read your plugs — they tell you what the compression test can’t.”
What Boaters Ask Me Most Often
Q: What’s a “good” compression number for my outboard?
A: It varies by engine. A 1990 two-stroke Johnson might run great at 90 PSI. A 2018 Yamaha four-stroke should see 120-140 PSI. The specific number matters less than the difference between cylinders. All cylinders within 10% of each other is the rule I live by.
Q: Can I do a compression test alone?
A: Yes, but it’s easier with a helper. One person cranks the engine while the other watches the gauge. If you’re alone, use a compression gauge with a “hold” button that traps the highest reading.
Q: How long does a compression test take?
A: For a V6 outboard (6 cylinders), about 15 minutes once you know what you’re doing. For a portable 2-cylinder, 5 minutes.
Q: Will a seller let me do a compression test?
A: A good seller will. At Wave Outboard Riders, we encourage it. We’ll put the engine on our test stand and let you watch while we run the test. If a seller refuses, that’s your answer.
Q: Do you include compression test results with every outboard you sell?
A: Yes. Every outboard that leaves our shop comes with a printed compression test report, signed by the mechanic who performed it. You’ll see the numbers for every cylinder. No surprises.
Internal link opportunity: Add: “Browse our inventory of compression-tested outboards →” (Link to your shop page.)
When to Walk Away — Real Examples
Three Engines I Told Customers to Avoid
Body text:
I’m going to share three real examples from the last year. These are engines customers brought to me for a pre-purchase inspection.
Example 1: The 2017 Mercury 150 Four-Stroke
Readings: 125, 122, 85, 120, 118, 124
Cylinder 3 was 35 PSI lower than the others. The seller claimed it “just needed a tune-up.” I pulled the spark plug from cylinder 3 — it was wet and smelled like fuel. The owner had been hiding a blown head gasket with a can of stop-leak.
Verdict: Walk away. The customer saved $9,000.
Example 2: The 2008 Yamaha 115 Two-Stroke
Readings: 92, 90, 88, 89
All cylinders within 5% of each other — beautiful. But the spark plugs were white and blistered. I did a leak-down test and found the engine was running lean at high RPM. The owner had been running it hard without ever adjusting the carburetors.
Verdict: Walk away unless you’re willing to rebuild the fuel system ($800-$1,200). The customer walked.
Example 3: The 2019 Evinrude E-TEC 150
Readings: 108, 106, 42, 107, 105, 43
Two adjacent cylinders (3 and 6) were dead. Classic blown head gasket between cylinders. The seller offered to drop the price by $2,000. I told the customer: “A blown head gasket on an E-TEC means pulling the power head. You’re looking at $3,000 in labor minimum.”
Verdict: Walk away. The customer bought a different Evinrude from us instead.
Image description to add here: A photo of a cylinder head with a visible blown head gasket. Caption: “A blown head gasket between cylinders — two adjacent low readings always mean this.”
Printable Checklist Download
Take This With You When You Inspect an Outboard
Body text:
I’ve created a printable compression test checklist that you can take with you when you inspect a used outboard. It has:
-
A step-by-step procedure you can follow in the field
-
A table to record readings for up to 8 cylinders
-
Spark plug condition reference guide
-
Red flags to watch for
-
Seller questions to ask
Download the free PDF here → (Link to your PDF file)
No email required. No signup. Just a tool to help you buy smarter.
Image description to add here: A screenshot of the first page of the PDF checklist. Caption: “Print this. Put it in your truck. Use it on every used outboard you look at.”
Final Thoughts — From My Hands to Yours
A Compression Test Is Free. A Rebuild Is $5,000.
Body text:
I’ve been doing this since 1978. I’ve seen every trick in the book — engines that run great cold but fail warm, sellers who claim “it just needs a tune-up,” outboards that look beautiful on the outside but are junk on the inside.
A compression test cuts through all of it. It’s a 15-minute test that costs you nothing but time. It tells you the truth.
If you’re looking at a used outboard — whether it’s from us or from a private seller — do the test. If the seller won’t let you, buy from someone who will.
At Wave Outboard Riders, we put our compression test results on every listing. You’ll see the numbers before you call us. You’ll get a signed report when the engine arrives. No secrets. No surprises.
That’s how I’d want to buy an outboard. That’s how we sell them.
Call me if you have questions about a specific engine: (555) 123-4567
Or browse our inventory of compression-tested outboards → (Link to your shop page)
Image description to add here: A photo of Tom Wilkins leaning against a workbench, holding a compression gauge, looking directly at the camera. Caption: “Tom Wilkins — 47 years. Call me. I’ll tell you the truth about that outboard you’re looking at.”
Section 10: Related Content
More Guides From Our Mechanics
Body text (internal links):
-
[Evinrude E-TEC Buyer’s Guide: What to Know in 2025 →] (link to your Evinrude guide)
-
[2-Stroke vs 4-Stroke: Which Is Right for You? →] (link to that blog post)
-
[Shaft Length Guide: Measure Your Transom Correctly →] (link to that guide)
-
[How We Ship Outboards (So They Arrive Perfect) →] (link to that blog post)